A HOMEMADE BACKPACKING TENT
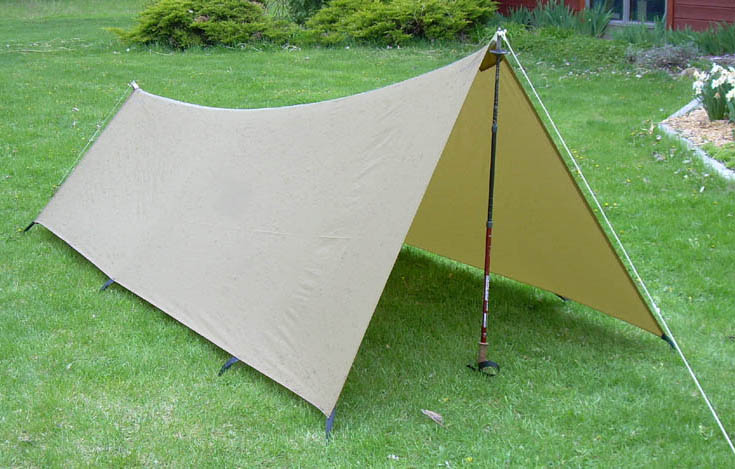 |
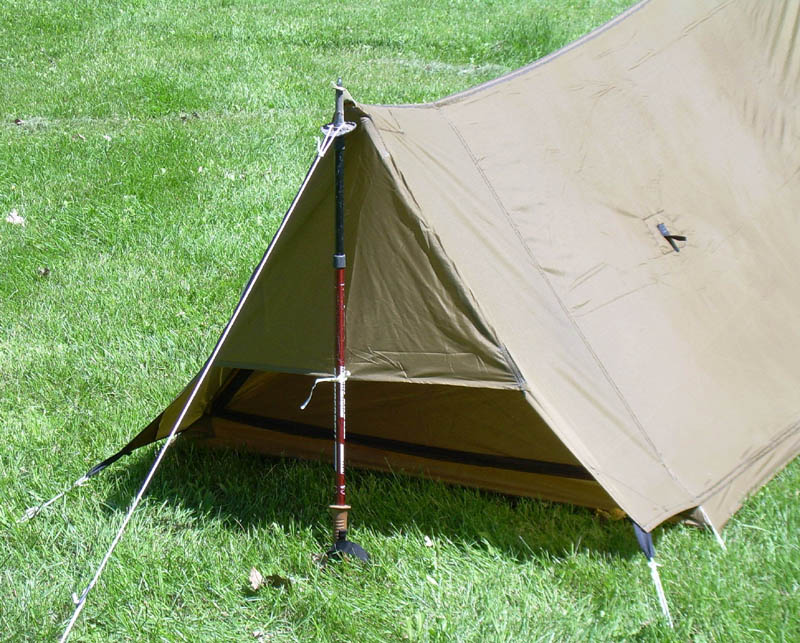
| Step 1 -- Make the roof. |
What will eventually be the roof of the tent is, at this point, a trapezoid shaped tarp with a catenary curve in the ridge. The "tarp" is approximately 120" (10') long, 104" (8.7') wide at the front, and 70" (5.8') wide at the rear. Set up as an A-frame, it is 54" wide and 45" high at the front and 42" wide and 31" high at the rear. For the catenary curve I used a 4.5" maximum deflection (at the center of the span). In retrospect, I think this was too much. A maximum deflection of around 3" would probably have been better. For a discussion of catenary curves and a link to a downloadable catenary curve calculator, go to Roger Caffin's Technical Note. Scroll down to the Mathematics section and click on the "spreadsheet" link in the text just below the chart. |
The fabric is polyurethane coated ripstop nylon that I picked up at Walmart several years ago for $1/yd. I can't be sure of the technical specs, but as near as I can tell it is 70D ripstop nylon with at least a 1500mm PU coating on the inside and no DWR coating on the outside. When I was done, I sprayed all outside surfaces, including the bottom of the floor, with a silicone waterproofing spray. My impression was that it didn't help very much. |
I ended up using about 10 yards of fabric to make the tent. Add in the cost of the other materials and the total out-of-pocket cost was less than $20. |
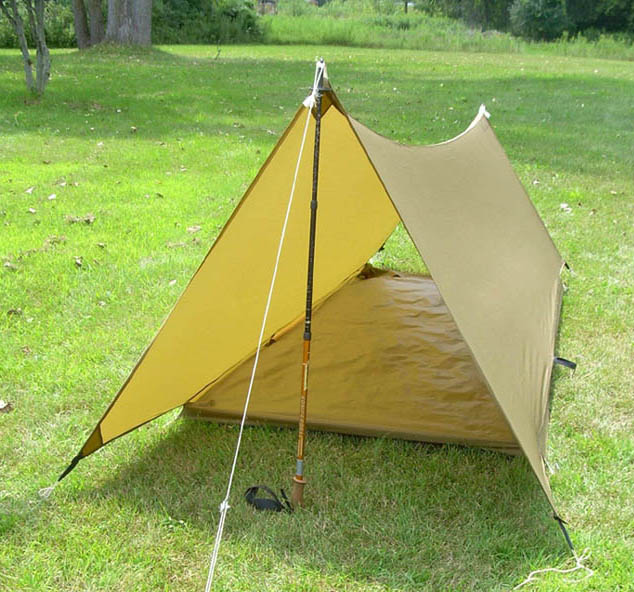 |
| Step 2 -- Add a bathtub floor. |
The bathtub floor is 88" long, 52" wide at the front, and 42" wide at the rear. The sides of the floor are 3" high. Since the fabric was 60" wide, these dimensions gave me a seamless floor and still left a one inch seam allowance on each side for attaching the floor to the roof. The height of the floor area is 39" at the front and 29" at the rear. |
The maximum width of the floor was partly dictated by the width of the the fabric. But there were a couple of other considerations at work. I wanted a floor space big enough for me and my gear, but which would accommodate two people in an emergency. With an A-frame design, the sides slope in so much that a greater floor width is necessary for one person to fit comfortably. |
The length of the floor provides ample space for my sleeping pad and bag. But it is short enough to allow the roof to overhang 20" at the front and 10" at the rear. Since this is a single wall tent, I was concerned about condensation. Many single wall tents use mesh along the sides as well as the front and rear to maximize ventilation. I wanted to avoid using mesh along the sides and tried to compensate by maximizing the mesh area at the front and rear and using overhangs to allow me to keep those areas wide open in all but the worst weather. Instead of small vents at a high point, warm moist air can rise along the curved ridge to the front where it can freely exit. The front overhang also creates a small "porch" that, when it is raining, offers shelter while entering and exiting the tent as well as a protected spot on the ground for cooking. |
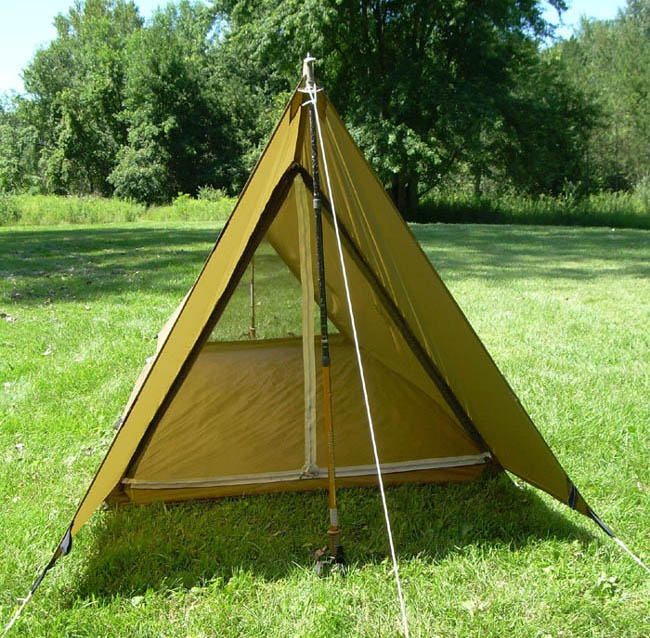 |
| Step 3 -- Add mosquito netting front and rear. |
I also used mosquito netting instead of no-see-um mesh to improve ventilation. I figured mosquito netting would be adequate in most situations and, because it has fewer and larger holes per square inch, would allow significantly more airflow. From what I could find, mosquito netting (230 to 270 holes per square inch) allows 80% - 85% airflow while no-see-um mesh (800 holes per square inch) only allows 65% airflow. Finer mesh would restrict airflow even more. |
The zippered mosquito netting at the front was salvaged from an A-frame tent that had seen its better days. It was a bit too small for the opening of this tent so I enlarged it by sewing on a narrow strip of fabric around the perimeter. The rear mosquito netting was cut from yard goods. |
Installing the netting was a struggle. I'm sure it didn't help that I was installing it 10" to 20" inside of the ends. Eventually, I managed an okay result. But the fit wasn't quite right and it distorted the roof fabric. Up until this point, I was able to get a taut pitch. Afterwards, I had wrinkles emanating from the line of stitching which no amount of adjustment could remove. |
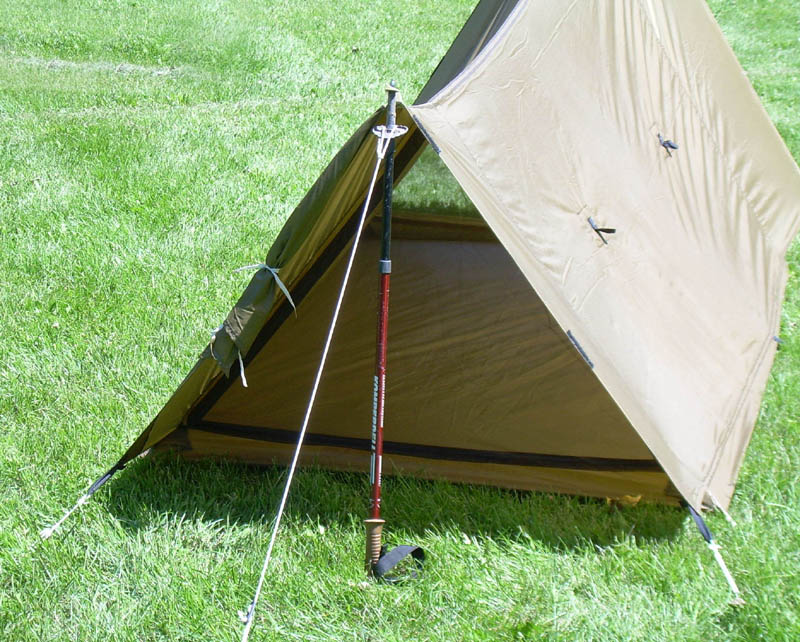 |
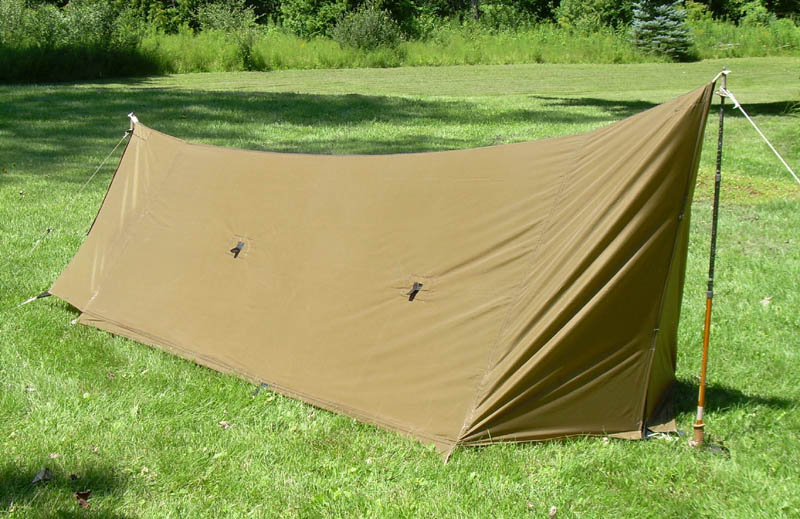
| Step 4 -- Add a rear storm flap and guy line attachments. |
On each side, I added two guy line attachments in the middle of the roof to provide additional stability in the wind. The guy line attachments can also be used to make the walls more vertical and create additional interior volume, which helps if the tent is housing two people. They work okay but I think it would have been better to install them closer to the ground. I also should have installed them before attaching the floor to the roof. Installing them when I did was awkward and my sewing suffered, causing further distortion in the roof fabric. |
A storm flap was sewed to one side of the rear edge of the roof. (You can see it rolled up and tied on the left side in the photo above.) Hook and loop strips were attached on the other side of the storm flap and matching strips were attached on the opposite side of the roof. A tie was attached at the center-bottom of the storm flap. |
Total weight of the finished tent is 2 lbs. 15 oz. |
 |
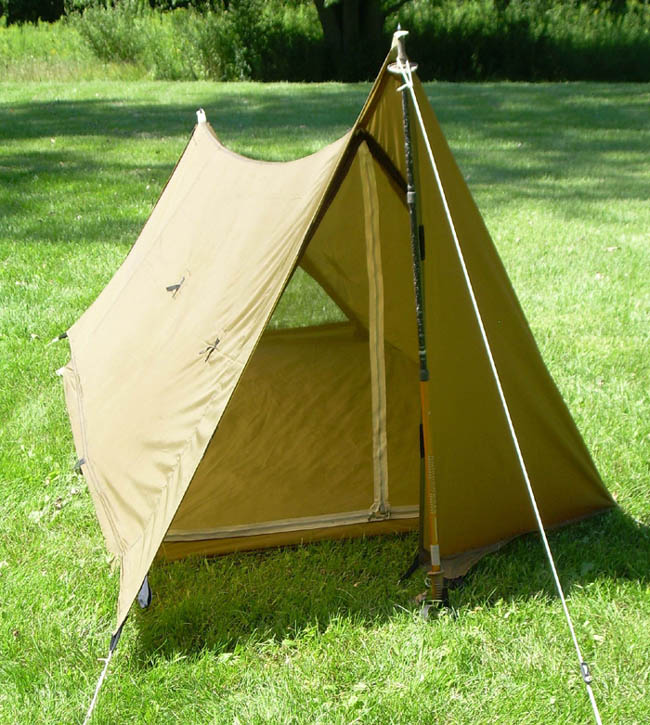
| The rear storm flap deployed. |
The flap is secured to the right hand side of the roof by hook and loop strips and can be tied to the hiking pole in the center. The storm flap only comes a bit over half way down the height of the tent. This, along with the 10" gap between the flap and the rear of the floored area, allows plenty of ventilation. Despite the space between the bottom of the flap and the ground, the overhang has prevented rain from entering the floored area (at least in the conditions I have experienced so far). |
 |
| The front flaps can be closed. |
Since I intended to use this primarily as a solo tent and had plenty of space inside the floored area to stow my gear, I didn't see the need for an enclosed vestibule. Moreover, the front overhang was designed to maximize ventilation by allowing the front of the tent to remain open. However, I recognized there might be a time when it was necessary to close off the front. |
When closed, the front flaps touch the ground at a different point than when they are open. I sewed another stake loop on each flap so I could stake them together at the bottom. I also sewed hook and loop strips on the inside edges of the flaps so they could be joined together when closed. When closed, they present a V shaped profile to the wind. |
I didn't get the size and shape of the front flaps quite right. When coupled with the distortion to the roof that resulted when I installed the front netting, I ended up with severe wrinkling when the flaps are closed. I think the concept is sound and the problems are fixable, but that can wait for another day. |
 |
| One front flap can be closed and the other left open. |
FIELD TEST -- On October 11, 2010 I began a three week hike
on the Appalachian Trail in southern Virginia. I had finished the tent only a few days before and decided at the last minute to bring it
with me. It was, as a practical matter, untested. But since I would be using it as a backup shelter (I planned on staying at the
AT shelters most of the time) and could pick and choose when I used it, I wasn't overly concerned.
|
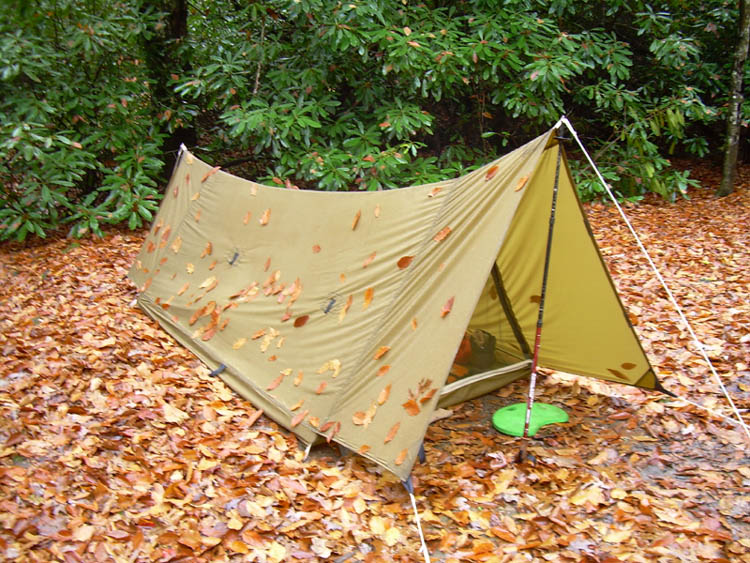 |
| The morning after. |
David Guenther